

Walking a Labyrinth promotes relaxation and de-stressing by focusing on the breath and stilling the mind. As the walker reconnects to her soul-spirit, she may be better able to see her illness as an ally and teacher. Inner healing can occur, regardless of whether or not physical recovery happens. The gently winding path guides the individual forward from one step to the next. The Labyrinth provides a safe space within which to dialogue with illness. By creating a safe space for personal expression, the Labyrinth promotes stress reduction. This does not mean freedom from stress, but rather freedom to stress. Healing occurs when the walker is able to honour what she is feeling, openly and honestly, rather than suppress so-called “negative” emotions.
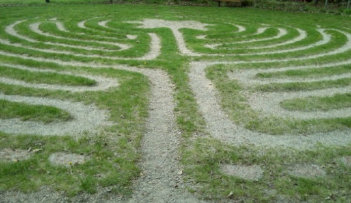
The Classical 7-circuit Labyrinth corresponds to the 7 Chakras and may be useful in bringing balance and wholeness to the walker. By focusing on a particular Chakra along each circuit, th3 individual may notice where there are blocked energies and clear them.
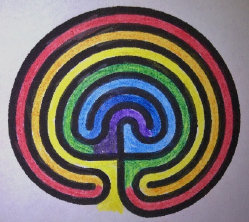
Below is a link to a virtual Labyrinth Chakra Meditation I created for the Lakeside Labyrinth web site. As you journey through each Chakra, you may wish to focus on where tensions and blocks arise. Breathe into those areas, with the intention to heal and bring about balance.
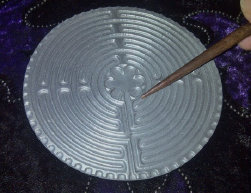
You will need your Timeline from Lesson 1. You may use either of the printable Labyrinths for your walk; choose the one that resonates with you the most. If you already work with a Labyrinth, or have access to one, you are free to use it instead.
Select 1 or 2 challenging events/eras, from the Timeline exercise. Ask the following questions: What made it tough? What supportive elements were missing? Does it still have an impact today? Are there recurring patterns? Write down any other pertinent questions.
Prepare your sacred space, meditate on the challenging area and when you are ready enter the Labyrinth. Allow each step to ground you further into yourself, and to truly feel the experience. You may experience a variety of uncomfortable emotions, fear, rage, shame. Allow these emotions to rise to the surface, notice them without judgment, and release them. Be receptive to any images that arise, but do not interpret them.
When you reach the center, stay as long as you need to. The center may provide comfort and nurturing, insight and clarity, or simply a space to be. When you are ready, follow the path out. If deep healing has occurred, you are likely to be feeling vulnerable and raw. Take the time you need to integrate the healing that has occurred. The return journey also provides an opportunity to gain strength prior to stepping out into the mundane world. When you are finished, write about any insights that came up on the walk, or make a collage of the images that arose.
All images are copyrighted and are the intellectual property of the author.
References:
Fortress, Lauren Walking a Sacred Path
Artress, Lauren The Sacred Path Companion
